Skip to content
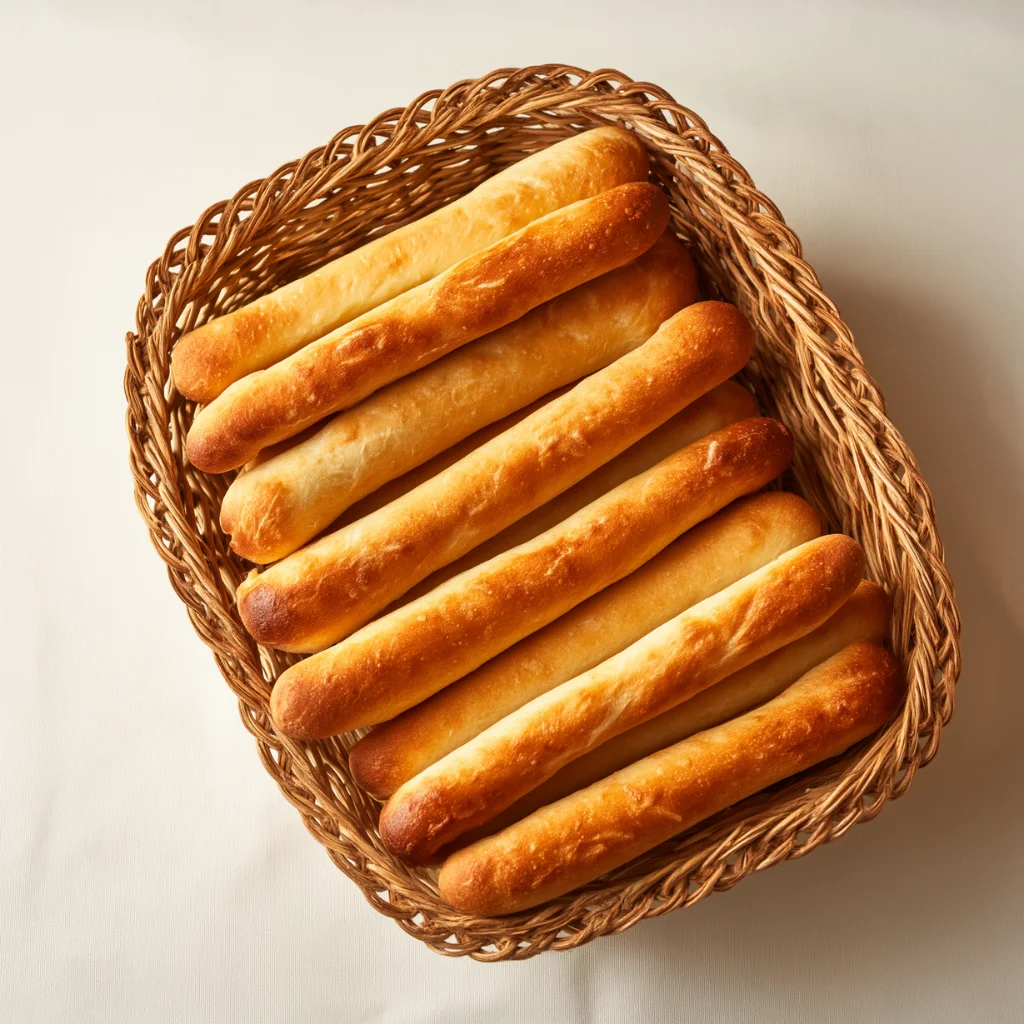
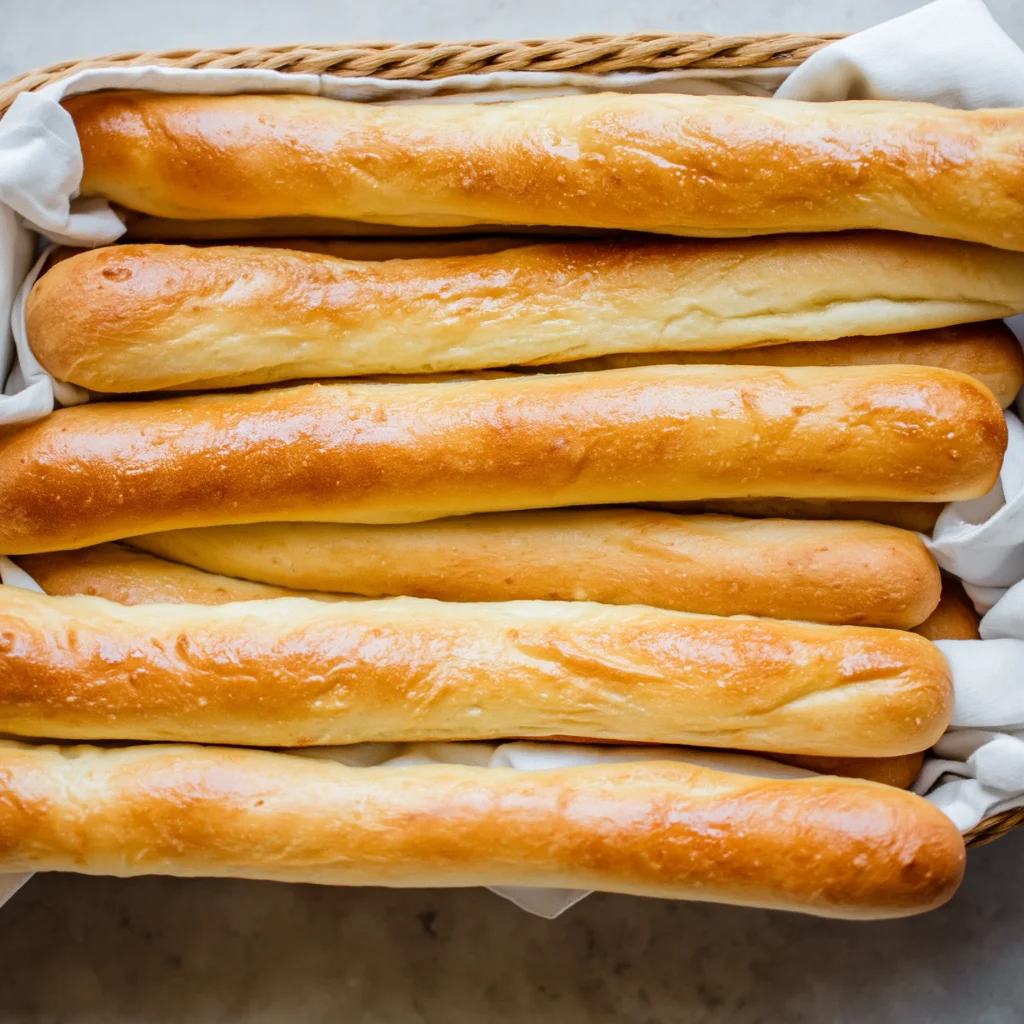
Olive Garden Breadsticks are one of those restaurant favorites people never seem to forget. They’re soft, fluffy, lightly golden, and brushed with a buttery garlic topping that makes them hard to leave alone once they hit the table. This homemade version brings that same warm, familiar feel to your kitchen with simple ingredients and a dough that’s very manageable to make at home.
These breadsticks fit right in with pasta night, a big salad, or a cozy bowl of soup. The dough gets plenty of time to rise, which gives the finished breadsticks their tender texture, and the buttery topping adds that signature finish just before serving. If you want a side dish that feels special without being complicated, this recipe is a very good one to keep close.
Why You’ll Love This Recipe
One of the nicest things about this recipe is how straightforward it is. The ingredient list is short, the steps are clear, and most of the total time is hands-off while the dough rises. You get the reward of homemade bread without a process that feels overly demanding.
The texture is another big reason to make these. The dough is kneaded until smooth and elastic, then left to rise until doubled. That rise time gives the breadsticks their soft interior and light bite, which is exactly what makes them so appealing fresh from the oven.
The topping also does a lot of the work when it comes to flavor. Melted butter mixed with garlic powder and salt gives each breadstick that familiar finish people expect. Brushed on while the breadsticks are warm, it sinks in just enough to make every bite buttery and savory.
These breadsticks are also easy to pair with dinner. They go well with hearty mains like garlic parmesan chicken pasta, creamy comfort dishes like Marry Me Chicken, or baked favorites such as chicken broccoli casserole.
Ingredients Notes
Warm water
The warm water helps wake up the yeast and get the dough started. The recipe calls for 110°F/45°C, which is right in line with standard active dry yeast guidance. If you want a quick reference for working with active dry yeast, Fleischmann’s yeast basics is useful.
Active dry yeast
This is what gives the breadsticks their rise and soft texture. Letting the yeast sit with the warm water and sugar until foamy is a small step that matters a lot, because it shows the yeast is active.
Granulated sugar
The sugar feeds the yeast and adds a very light touch of balance to the dough. It does not make the breadsticks sweet, but it helps round out the flavor.
All-purpose flour
Flour gives the dough its structure. The goal is a dough that feels soft and workable after kneading, not dry and stiff.
Salt
Salt appears in both the dough and the topping. In the dough, it balances the flavor. In the topping, it helps create that familiar restaurant-style finish.
Unsalted butter
Butter adds richness to the dough and gives the topping its glossy, buttery coating. Brushing it on while the breadsticks are still warm makes a real difference.
Garlic powder
This is what gives the topping its signature flavor. It blends smoothly with the butter and coats each breadstick evenly.
How To Make Olive Garden Breadsticks
1. Proof the yeast
In the bowl of a stand mixer, combine the warm water, yeast, and sugar. Let the mixture sit for 5 to 10 minutes until it turns foamy.
2. Mix the dough
Add the flour, salt, and melted butter. Mix until a dough forms. At this stage it may look a bit rough, but that is normal.
3. Knead until smooth
Knead the dough for about 7 to 10 minutes until it becomes smooth and elastic. The dough should feel soft but not sticky.
4. Let it rise
Transfer the dough to a lightly oiled bowl, cover it, and let it rise in a warm place for 1 to 1.5 hours, or until doubled in size.
5. Divide and shape
Punch down the dough and divide it into 12 equal pieces. Roll each piece into a breadstick shape about 7 inches long.
6. Rise again
Place the shaped breadsticks on a lined baking sheet, cover, and let them rise again for 30 minutes. This second rise helps keep them light and fluffy.
7. Bake
Preheat your oven to 400°F (200°C). Bake the breadsticks for 12 to 15 minutes, or until lightly golden.
8. Add the topping
Mix the melted butter, garlic powder, and salt, then brush it over the warm breadsticks before serving. This last step gives them their classic flavor and finish.
If you want more side-and-main dinner ideas, the dinner recipe collection is a handy place to look.
Tips for Success
Start by checking that your yeast is active. If the yeast mixture does not foam after several minutes, it is better to begin again than to continue with dough that may not rise well.
Keep an eye on the dough texture while kneading. It should feel soft and smooth. If it is very sticky, a small amount of extra flour can help, but too much flour can make the breadsticks heavier than you want.
Let the dough rise in a warm, draft-free spot. That helps it double more evenly and gives the finished breadsticks a better texture.
Try to shape the breadsticks to a similar size so they bake at the same pace. Even sizing helps you avoid some turning too brown while others stay pale.
Brush the topping on while the breadsticks are still warm. That helps the butter soak in slightly and gives the garlic and salt better coverage.
Frequently Asked Questions
Can I make these without a stand mixer?
Yes. You can mix the dough by hand and knead it on a lightly floured surface until smooth and elastic.
Why didn’t my dough rise?
The most common reasons are inactive yeast, water that was too hot or too cool, or a room that was too cold. Active dry yeast generally works best with warm water in the usual proofing range, and a warm kitchen helps the dough rise more steadily.
How do I know when the breadsticks are done?
They should be lightly golden after 12 to 15 minutes in a 400°F oven. You want them baked through but still soft.
What should I serve with Olive Garden Breadsticks?
They pair well with soups, salads, pasta, and many comfort-food dinners. Their flavor is gentle enough to work with a lot of main dishes.
How should I store leftovers?
Once cooled, store leftover breadsticks in a covered container. For general leftover food safety timing, USDA food safety guidance is a solid reference.
Fresh from the oven, these breadsticks are soft, buttery, and full of that familiar garlic finish that makes them so popular. They take some time because of the rises, but the active work is simple, and the result is well worth it when a warm batch lands on the table.

- 15-Minute Chicken Caesar Wrap - May 11, 2026
- Nutella Stuffed Cookies - May 10, 2026
- Honey Glazed Salmon That Makes Dinner Feel Easy - April 28, 2026